
If you’ve ever wondered how to position the bar just right, engage your core effectively, and execute this powerful exercise with precision, you’re in the right place.
In this article, we’ll walk you through the step-by-step process, so whether you’re a beginner or looking to refine your technique, you’ll leave with the knowledge to conquer the low bar squat like a pro. Let’s dive in!
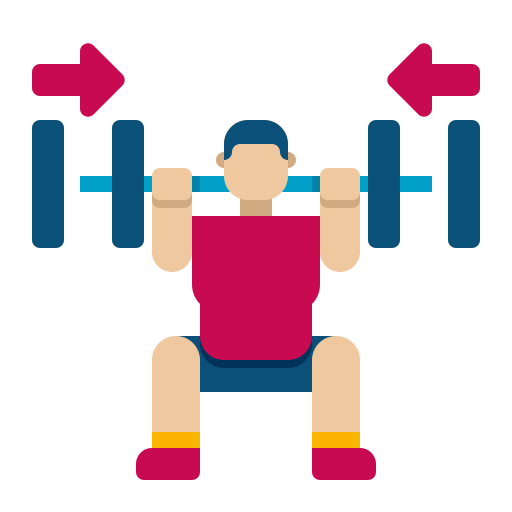
Understanding the low bar squat, bar placement: How and why.
In a low bar squat, the bar should be placed in the “sweet spot” The sweet spot is typically around the mid-trap area.
The placement of the bar on your back is crucial for proper form and effectiveness. Here’s how you should position the bar:
Find the Bar’s Sweet Spot: Locate the “sweet spot” on the barbell. This is the point where the bar rests comfortably on your upper back without putting excessive pressure on your spine or neck. The sweet spot is typically around the mid-trap area.
Set Up Your Grip: Step under the bar and position it across your upper back, not your neck. To do this, grip the bar with your hands slightly wider than shoulder-width apart.
Your hands should be placed evenly on the bar, with your elbows pointing down and back.
Create a Shelf: Create a “shelf” for the bar to rest on by squeezing your shoulder blades together. This shelf will provide a stable platform for the barbell.
Bar Placement: The bar should sit below the top of your traps and on the upper part of your rear deltoids (the muscles on the back of your shoulders). It should not be resting directly on your neck or too high on your back.
Bar Position: The bar should be positioned lower on your back than in a high bar squat. It should rest just above the rear deltoids and below the spine of the scapula (the bony ridge on your upper back).

This lower placement shifts the center of gravity slightly back, allowing you to lean forward more while maintaining balance.
Engage Your Core: Before unracking the bar, engage your core muscles to create stability throughout your torso.
Unrack Carefully: Carefully step back and unrack the bar, maintaining your posture and core engagement.
Perform the Squat: As you squat down, make sure to keep your chest up, back straight, and the bar in its initial position.
The low bar squat typically involves a more forward hip hinge compared to a high bar squat.
Maintain Proper Form: Throughout the squat, focus on keeping your back tight, chest up, and the bar on the shelf created by your shoulder blades. This will help you maintain balance and stability.
Rack the Bar Safely: After completing your set, carefully walk back to the squat rack and re-rack the bar.
Proper bar placement in a low bar squat is essential for distributing the weight effectively and minimizing the risk of injury.
Remember to start with lighter weights to practice your form and gradually increase the load as you become more comfortable with this squat variation.
If you’re new to squatting or have any doubts about your form, consider seeking guidance from a qualified trainer.
Further Explanations.
Let’s delve deeper, let me explain these points mentioned further.
let’s break down those important steps for setting up the bar in a low bar squat:
1. Find the Bar’s Sweet Spot
Location:
The “sweet spot” is the ideal area on the barbell where it should rest on your upper back. It’s the point that provides comfort and stability while squatting.
Typical Location:
In the context of a low bar squat, the sweet spot is usually around the mid-trap area. Your trapezius muscles, commonly known as traps, are broad muscles that run down the upper part of your back. The sweet spot is often found at the midpoint of these muscles.
Comfort and Pressure:
When you place the bar in the sweet spot, it should feel comfortable, and you shouldn’t experience excessive pressure on your spine or neck.
This position allows you to distribute the weight of the barbell effectively across your upper back.
2. Set Up Your Grip.
Positioning:
To set up your grip, step under the barbell and ensure it’s positioned across your upper back, not your neck.
It’s essential to avoid placing the bar too high, as it can cause discomfort and strain on your neck.
Hand Placement:
Grip the bar with your hands slightly wider than shoulder-width apart. This wider grip provides stability and control during the squat.
Elbow Placement:
Your elbows should be pointing down and back, not flared outward. This position helps create a secure shelf for the bar to rest on.
When your elbows are pointing down, it engages your back muscles, which aids in supporting the weight of the bar.
By combining these two steps, you’ll effectively position the barbell for a low bar squat.
The bar should sit comfortably on the sweet spot of your upper back, and your hands and elbows should be in the right position to maintain control and stability throughout the squat.
This setup allows you to lift heavier weights safely and perform the low bar squat with proper form.
3. Create a Shelf.
Purpose:
Creating a “shelf” with your upper back is essential for providing a stable platform for the barbell to rest on during a low bar squat.
Technique:
To create this shelf, you need to squeeze your shoulder blades together. This action effectively tightens and engages the muscles of your upper back, primarily the rhomboids and middle trapezius.
Result:
As you squeeze your shoulder blades together, you’ll notice that the muscles in the upper part of your back form a kind of natural cushion or ledge. This is the “shelf” that will support the barbell.
4. Bar Placement.
Location:
The bar should be positioned on this created shelf, not directly on your neck or too high on your back. In a low bar squat, the goal is to have the bar sit lower on your back compared to a high bar squat.
Specific Location:
The bar should rest below the top of your trapezius muscles, which are the large, diamond-shaped muscles that cover your upper back.
It should sit on the upper part of your rear deltoids, which are the muscles located on the back of your shoulders.
Avoiding Neck Pressure:
Placing the bar too high can cause excessive pressure on your neck, leading to discomfort and potential injury. It’s crucial to keep the bar below the neck level to ensure it’s resting on the muscles of your upper back, not on your cervical spine.
By combining these two steps, you’re essentially setting up the proper foundation for the low bar squat.
The “shelf” you create by squeezing your shoulder blades together provides a secure and cushioned support for the barbell, while the bar placement ensures it’s in the correct position on your upper back and not causing any undue pressure on your neck.
This setup allows you to perform the low bar squat safely and effectively, distributing the weight across your back muscles and maintaining proper form.
5. Bar Position.
Lower Placement:
In a low bar squat, the barbell should be positioned lower on your back compared to a high bar squat. This lower placement is a key characteristic of the low bar squat technique.
Location:
The bar should sit just above the rear deltoids, which are the muscles located on the back of your shoulders. It should also be below the spine of the scapula, which is the bony ridge on your upper back.
Purpose:
This lower bar placement shifts the center of gravity slightly back compared to a high bar squat.
This shift in the center of gravity allows you to lean forward more while still maintaining balance. It also encourages a more hip-dominant movement pattern, where your hips move back and down as you squat.
6. Engage Your Core.
Core Engagement:
Engaging your core means contracting and bracing the muscles of your abdomen and lower back to create stability and support for your spine.
Importance:
Engaging your core is crucial in any squat variation, including the low bar squat, as it helps protect your lower back, maintain an upright torso, and stabilize your entire body during the movement.
Technique:
To engage your core, take a deep breath, expanding your diaphragm and ribcage, and then tighten your abdominal muscles as if you were preparing to be punched in the stomach.
This creates a strong, stable core that can withstand the load of the barbell.
Combining these two aspects, the lower bar position in a low bar squat allows for a different center of gravity and movement pattern compared to a high bar squat.

Engaging your core before unracking the bar ensures that you have a solid foundation and support for your spine throughout the squat movement.
Together, these elements help you perform low bar squats with proper form, balance, and safety, allowing you to lift heavier weights effectively.
7. Unrack Carefully.
Purpose:
Unracking the barbell carefully is crucial to ensure that you start your squat with a stable and balanced foundation.
Technique:
To unrack the bar, first ensure that your core is engaged, and your body is properly positioned under the bar.
Then, lift the bar off the rack by straightening your hips and knees. Take small, controlled steps backward to clear the rack, all while maintaining your posture, core engagement, and the position of the bar on your back.
Maintaining Posture:
Throughout the unracking process, it’s vital to keep your back straight, chest up, and core tight.
This prevents any unnecessary strain on your lower back and helps you maintain balance.
8. Perform the Squat.
Maintain Chest and Back Position:
As you begin the descent of the squat, it’s essential to keep your chest up and your back straight. This helps maintain a strong and stable torso.
Bar Position:
Ensure that the bar stays in its initial position on your upper back throughout the squat. It should not roll or shift, which can lead to balance issues or discomfort.
Hip Hinge:
In a low bar squat, there is typically more emphasis on a forward hip hinge compared to a high bar squat.
This means that, while your hips move back and down, your torso may naturally lean forward slightly. This hip hinge allows you to engage your glutes and hamstrings more, making the movement more hip-dominant.
Proper Depth:
Descend until your thighs are at least parallel to the ground or lower, depending on your flexibility and mobility. Ensure your knees track in line with your toes, and do not allow them to collapse inward.
By unracking the bar carefully and maintaining proper posture, you set the stage for a successful low bar squat.
As you perform the squat itself, keeping your chest up, back straight, and the bar in its initial position while incorporating a forward hip hinge allows you to engage the right muscles and execute the movement effectively.
This technique helps distribute the load evenly and minimizes the risk of injury while lifting heavier weights in a low bar squat.
9. Maintain Proper Form.
Focus on Form:
Regardless of the phase of the squat (descent, ascent, or at the bottom), it’s crucial to prioritize maintaining proper form.

Back Tightness:
Keep your back tight throughout the entire movement. This involves squeezing your shoulder blades together to maintain the shelf-like structure for the bar and engaging your back muscles. A tight back provides stability and prevents the bar from rolling or sliding during the squat.
Chest Up:
Ensure your chest is up, and your upper body is upright. This not only helps maintain balance but also keeps your spine in a neutral position, reducing the risk of injury.
Bar Position:
Pay close attention to the bar’s position on your back. It should stay on the shelf created by your shoulder blades and should not shift or move. This stability is critical for effective and safe squatting.
10. Rack the Bar Safely.
After Completing Your Set:
Once you’ve completed your set of low bar squats, it’s time to safely return the barbell to the squat rack.
Walk Back to the Rack:
Carefully walk back to the squat rack while still maintaining control of the bar. Maintain your proper form as you move; do not rush or compromise your posture.
Re-Rack the Bar:
When you reach the squat rack, ensure that the barbell is aligned with the hooks or safety pins. Gently lower the barbell onto these supports, making sure it’s securely in place before letting go.
Safety:
The importance of safely re-racking the bar cannot be overstated. An improperly re-racked bar can lead to accidents, injuries, or damage to the equipment.
Always take your time to ensure a safe and controlled re-racking process.
By focusing on maintaining proper form throughout the squat and then safely re-racking the bar at the end of your set, you prioritize safety and effective training.
These steps help you get the most out of your low bar squats while minimizing the risk of injury.
A tabular on this topic here.
Here’s a tabular representation of how the placement of the bar should be in a low bar squat, including key details :
| Aspect of Bar Placement | Description | Ideal Placement |
|---|---|---|
| Sweet Spot | The point where the bar rests comfortably on your upper back without excessive pressure on the spine or neck. | Typically around the mid-trap area. |
| Hand Position (Grip) | How you grip the bar to create stability and control during the squat. | Hands slightly wider than shoulder-width apart. |
| Elbow Placement | The position of your elbows to create a secure shelf for the bar. | Elbows pointing down and back. |
| Bar Position | Where the bar should sit on your back in relation to the spine of the scapula and traps. | Below the top of the traps, above the rear deltoids. |
| Core Engagement | Engaging your core muscles to create stability before unracking the bar. | Prior to unracking the bar. |
| Unrack Carefully | How to lift and step back with the bar while maintaining posture and core engagement. | Controlled steps, maintaining posture. |
| Squat Execution | Maintaining proper form during the squat, including chest and back position. | Chest up, back straight, bar in the initial position. |
| Safety Re-Racking | Safely returning the bar to the squat rack after completing a set. | Careful walk back, gentle placement on supports. |
Please note that the ratios are not applicable in this context as they are not relevant to the bar placement in a low bar squat. The focus here is on proper technique and positioning rather than specific numerical ratios.
Conclusion.
In conclusion, proper bar placement in a low bar squat is essential for effective and safe performance.
Key aspects include finding the sweet spot on your upper back, using an appropriate hand grip and elbow position, positioning the bar below the top of your traps and above your rear deltoids, engaging your core for stability, and maintaining proper form throughout the squat.
Safely unracking and re-racking the bar is equally important. These guidelines ensure a stable foundation and minimize the risk of injury while performing low bar squats.

Hey there, it’s Mike Rrsq, the Editor-in-Chief over at Jsquat.com, and I’m absolutely obsessed with all things squat fitness! I’ve been lucky enough to get some serious recognition for my work in this field. With a solid background in the fitness and wellness industry, I’ve been there right from the get-go, helping shape this website into what it is today.
You see, I’m not just the boss around here; I’m also a passionate contributor. I love sharing my insights through my articles, and trust me, they’re not your run-of-the-mill stuff. Each piece I write is a labor of love, filled with my expertise and real-world experience in the fitness universe. So, if you’re into fitness and looking for some inspiration, you’re in the right place!